
What Is an S-Turn? The Ground Reference Maneuver That Teaches You to Beat the Wind
An S-turn is a ground reference maneuver in which a pilot flies a series of equal half-circles on opposite sides of a straight line on the ground — usually a road — crossing the line with the wings level each time. The goal is to vary bank angle continuously so both loops come out the same size despite the wind trying to push the airplane off track.
Here’s the part that trips up almost every student the first time: the airplane doesn’t fly over the ground in a clean line. It flies through a block of air, and that block is sliding sideways with the wind. Draw an S on a chalkboard and it looks easy. Try to draw that same S in the sky on a windy day and the wind smears one loop fat and squeezes the other one skinny.
The S-turn is where you learn to win that fight. It’s one of three ground reference maneuvers every Private Pilot flies, and pound for pound it’s the one that teaches wind-drift correction the fastest — because the wind helps you on one loop and fights you on the other, all within a few seconds of each other. Let me brief it the way I would before we dropped down to maneuvering altitude.
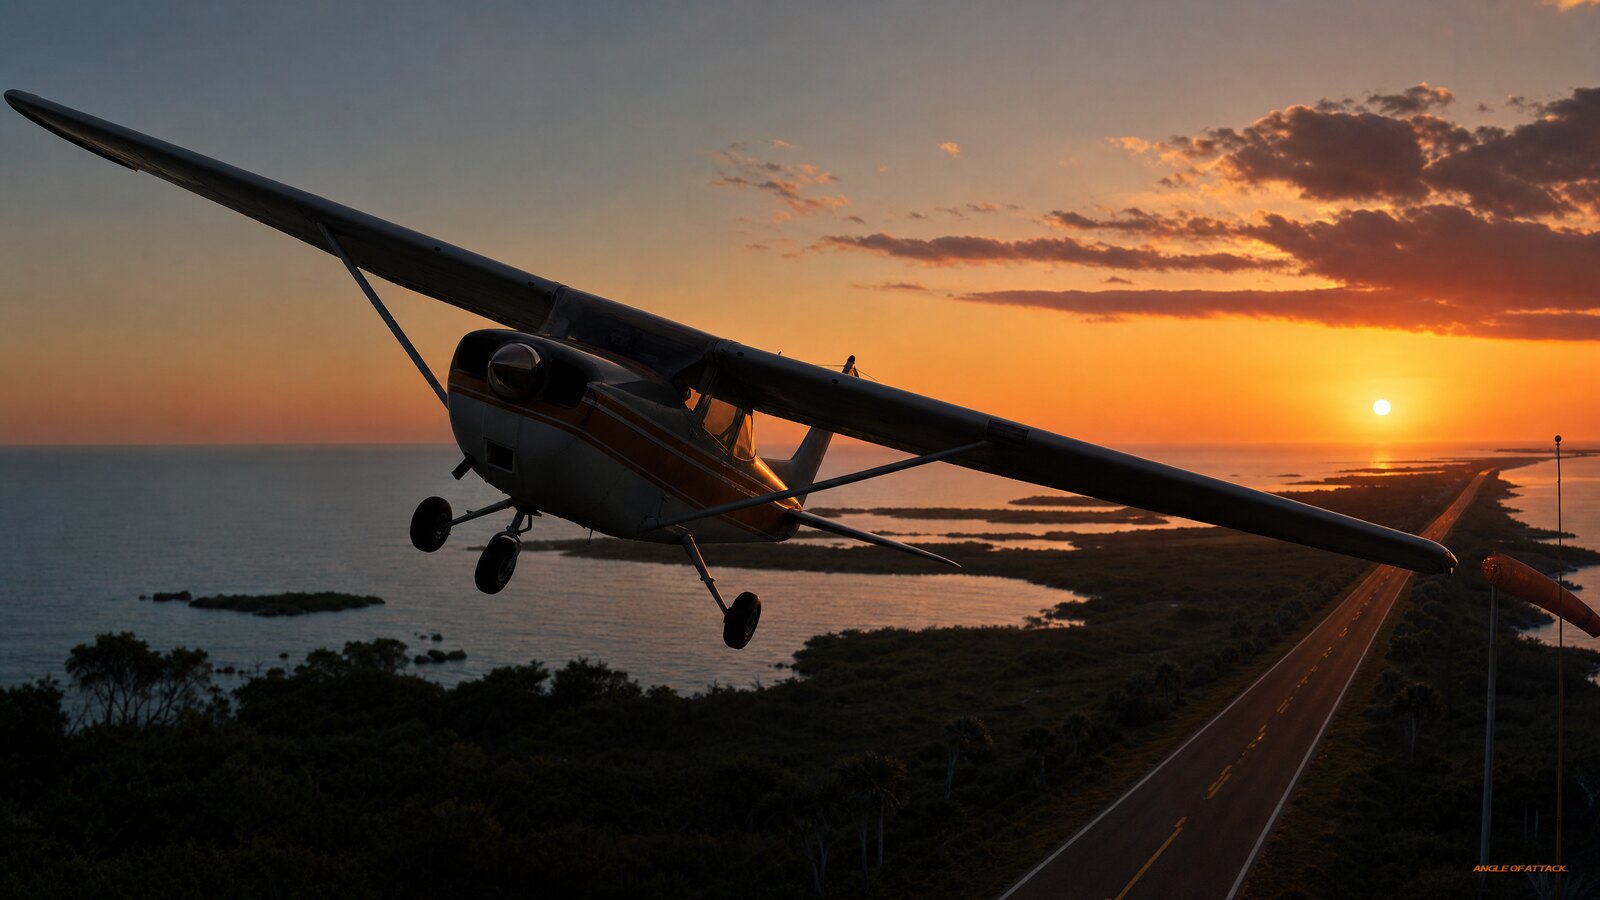
- An S-turn is symmetric half-circles across a road. You fly equal-radius loops on each side of a straight reference line, crossing it wings-level every pass.
- Wind drift is the whole point. Because the wind helps on one loop and hurts on the other, you must constantly change bank angle to keep both half-circles the same size.
- Steepest bank is downwind. Your bank is steepest where your groundspeed is highest (rolling out of the downwind side) and shallowest where groundspeed is lowest (heading into the wind).
- Cross the road perpendicular and wings-level. The reference line should be roughly 90 degrees to the wind, and you cross it with wings level — no bank — every single time.
- Flown low, but not too low. The Airplane Flying Handbook recommends practicing ground reference maneuvers at roughly 600 to 1,000 feet AGL — low enough to see drift, high enough to recover safely.
- It’s on the checkride. S-turns across a road are part of the ground reference maneuvers area of operation in the FAA Private Pilot ACS.
- It builds the pattern. The same drift-correction instinct you build flying S-turns is exactly what keeps your traffic pattern tidy.
WHAT’S IN THIS GUIDE
- 1What is an S-turn?
- 2Why do pilots learn S-turns?
- 3How do you fly an S-turn step by step?
- 4Why does the wind force you to change your bank angle?
- 5How high and how fast do you fly S-turns?
- 6What are the most common S-turn mistakes?
- 7The road that wouldn’t cooperate: an Alaska lesson
- 8PLT Study Guide
- 9Frequently Asked Questions
What is an S-turn?
An S-turn is a ground reference maneuver in which a pilot flies a series of equal half-circles on opposite sides of a straight reference line — most often a road — while continuously correcting for wind drift. The Airplane Flying Handbook (AFH, FAA-H-8083-3C, Chapter 6) describes it as a maneuver that develops a pilot’s ability to compensate for drift during turns.
The shape is the easy part to picture: imagine writing a cursive lowercase “s” over and over along a road, with the road running through the middle of each curve. You cross the road, carve a half-circle out to one side, come back, cross the road wings-level, then carve a matching half-circle out the other side.
The hard part — and the entire reason the maneuver exists — is that the wind is blowing across that road. On the half-circle where you’re drifting toward the road, the wind helps you turn back. On the half-circle where you’re drifting away, the wind fights you. To make both loops the same size, you have to vary your bank angle the whole way through. Do it well and your track over the ground looks like a tidy, symmetric S. Do it poorly and one loop balloons while the other pinches in.
Why do pilots learn S-turns?
Pilots learn S-turns to build wind-drift correction, precise low-altitude aircraft control, and the divided attention needed to fly the airplane by what’s happening outside. The FAA treats S-turns as foundational because the same skill set transfers straight into the traffic pattern, takeoffs, and landings — the phases of flight where the wind matters most and where mistakes are least forgiving.
The thing about wind drift is that you can’t feel it once you’re airborne. The airplane slides quietly downwind, the instruments look perfectly normal, and the only way to catch the drift is to look outside and compare your path to the ground. S-turns force you to build that outside scan until it’s automatic.
S-turns are especially good at this because they pack the full wind problem into a tight loop. Within a few seconds you go from a tailwind component to a headwind component and back, so you’re constantly adjusting. There’s nowhere to hide. By the time you can fly a clean, symmetric S in a stiff breeze, your hands have learned a smoothness on the controls that shows up everywhere else you fly.
How do you fly an S-turn step by step?
You fly an S-turn by entering across the reference line flying downwind, with the wings level at the moment you cross, then rolling immediately into the steepest bank of the maneuver and gradually shallowing it as the airplane turns into the wind — arriving back at the line wings-level, ready to repeat the mirror image on the other side. Each half-circle must be the same radius.
Here’s the sequence the way I teach it. Pick a straight road or section line that runs roughly perpendicular to the wind, and set up to cross it flying directly downwind. The moment your airplane is over the line, your wings should be level — that’s the entry.
As soon as you cross, you roll into a bank. Because you’re heading downwind with the highest groundspeed of the whole maneuver, this first bank is the steepest one you’ll use. As the airplane comes around and starts heading into the wind, your groundspeed drops, so you steadily shallow the bank. You time it so that when you arrive back at the road, your wings are level again, pointed across the line in the opposite direction.
Now you do the mirror image. Cross the line wings-level, roll into a bank on the other side, and shape that half-circle to match the first one exactly. The two loops should be the same size — that’s the whole grade. Keep your altitude pinned and keep the ball centered; a coordinated S-turn is a smooth one.
Why does the wind force you to change your bank angle?
The wind forces you to change bank angle because your groundspeed changes continuously as you turn through it. To carve a half-circle of constant radius over the ground, you bank steepest where your groundspeed is highest — crossing the line downwind — and shallowest where groundspeed is lowest — at the point of the loop where you’re heading most directly into the wind. A constant bank in wind would warp the loop.
Here’s the logic. When the wind is behind you, it adds to your airspeed over the ground, so you’re covering ground fast. Going fast around a fixed-radius arc demands more bank. As you turn into the wind, the wind subtracts from your groundspeed, you slow down over the ground, and you need much less bank to hold the same curve.
So the bank is never fixed — it’s bleeding off continuously from steep to shallow across each half-circle, then building back up on the next one. The rule that ties it all together, and the one the FAA tests, is simple enough to never forget: steepest bank downwind, shallowest bank upwind. Get that one principle into your bones and S-turns stop feeling like guesswork.
How high and how fast do you fly S-turns?
S-turns are flown low so you can actually perceive wind drift against the ground. The Airplane Flying Handbook recommends practicing ground reference maneuvers at roughly 600 to 1,000 feet AGL — low enough to clearly read your track, high enough to recover safely. Airspeed should be a normal cruise or maneuvering speed, comfortably at or below the airplane’s design maneuvering speed, V_A.
Altitude matters more than students expect. Fly too high and the ground crawls by so slowly that you can barely sense the drift, which defeats the purpose of the exercise. Fly too low and you’ve shaved into your safety margin if you get slow or distracted. That 600-to-1,000-foot band is the compromise the FAA settled on for clear drift cues with a reasonable buffer.
| S-turn element | What it should look like | Why |
|---|---|---|
| Altitude | Roughly 600 to 1,000 ft AGL, held constant | Low enough to see drift, high enough for a safe margin |
| Airspeed | Normal cruise or maneuvering speed, at or below V_A | Stays within structural limits while leaving margin above the stall |
| Reference line | A straight road or section line, ~90° to the wind | Makes the wind effect obvious and symmetric to correct |
| Crossing the line | Wings level, every pass | Marks the boundary between equal half-circles |
| Bank downwind | Steepest of the maneuver | Highest groundspeed needs the most bank |
| Bank upwind | Shallowest of the maneuver | Lowest groundspeed needs the least bank |
On speed: set a stable power and trim before you start, then leave the throttle alone so airspeed and altitude become products of your pitch and bank discipline, not your hand fidgeting on the throttle. And keep it coordinated — ball in the center — because skidding a turn down low is exactly the setup the FAA wants you to learn to never do.
If you’re brand-new to all of this, the free Total Student Pilot course walks you through the four forces, slow flight, and basic maneuvering so these low-altitude exercises don’t feel like a firehose the first time your instructor demonstrates one.
What are the most common S-turn mistakes?
The most common S-turn mistakes are flying a constant bank instead of varying it for the wind, crossing the road with the wings already banked, and fixating inside the cockpit so the half-circles come out unequal. Almost every error traces back to one root cause: the pilot is flying the bank angle they expect to use instead of flying the actual track over the ground.
The classic giveaway is unequal loops — one fat, one skinny. That happens when you hold a steady bank instead of bleeding it off as your groundspeed changes. The wind stretches the loop where it’s pushing you away from the road and pinches the loop where it’s helping you turn back. The fix is to keep reading the ground and keep adjusting bank, not to set a number and freeze.
Another frequent one is banking too early or too late at the crossing. You’re supposed to cross the reference line with wings level, every pass. If you’re already banked when you cross, your geometry is off before the half-circle even starts. Discipline that crossing and the rest of the maneuver lines up.
And then there’s the altitude leak. Students get so absorbed in the wind-correction puzzle that they stop scanning the altimeter and quietly climb or descend out of tolerance. Remember, the examiner is grading altitude and coordination at the same time as your ground track. S-turns are a divided-attention maneuver — the day you can hold altitude without thinking about it is the day the maneuver clicks.
If you want the wind logic to genuinely click before your instructor straps you in, our Private Pilot Ground School breaks down each ground reference maneuver with the wind diagrams, the bank-angle reasoning, and the actual test questions, so you show up to the airplane already understanding what the wind is doing to you — day-one ready, not just checkride ready.
The road that wouldn’t cooperate: an Alaska lesson
I learned the real lesson of S-turns from a student who could recite the theory perfectly and still couldn’t fly two matching loops to save his life. He’d brief it back to me cold — steepest bank downwind, shallowest upwind, cross the road wings-level — and then we’d get up over a long gravel road south of the field and his first loop would come out twice the size of the second one. Every time.
The problem was that he was flying the airplane, not the road. He’d cross the line, set what he figured was the “right” bank, and then lock his eyes on the panel and just hold it. Meanwhile a good Alaska crosswind was quietly ballooning his upwind loop because he wasn’t shallowing the bank as his groundspeed dropped.
So I had him throw out the numbers. I told him to forget degrees of bank entirely — just watch the road, watch how far his loop was bulging out from it, and make the next loop bulge out exactly the same distance. Adjust whatever you have to adjust to make those two distances match. One pass later, he felt the airplane wanting to drift wide heading into the wind, rolled the bank out to tighten the loop, then steepened it again rolling back downwind. The two halves came out even. He actually laughed.
That’s the whole secret to every ground reference maneuver, and S-turns make it click faster than any of them. You don’t fly a number off the attitude indicator down low — you fly the picture out the window and let your hands chase the track. Once that lands, the traffic pattern stops being a string of memorized headings and becomes something you just fly, wind and all.
PLT Study Guide
The FAA tags knowledge-test questions with PLT (Pilot Learning Statement) codes. For S-turns, the codes that actually match this content are:
PLT258 — Recall ground reference maneuvers / ground track diagram. This is the one to know cold. Test questions under this code show you a wind arrow and a ground track and ask where your bank should be steepest, where you start or stop a turn, or how the wind distorts the path. The plain-English study point: in an S-turn, your bank is steepest crossing the line downwind (highest groundspeed) and shallowest heading into the wind (lowest groundspeed), and you must vary it continuously so both half-circles come out equal. Be ready to read a ground-track diagram and figure out the wind direction from the shape of the S.
PLT198 — Recall course / heading — effects of wind. This code covers the underlying idea that powers the whole maneuver: wind moves the airplane over the ground, so the path you fly through the air is not the path you trace over the ground. Study point: to hold a desired track in a crosswind, the airplane’s heading has to point partly into the wind to offset the drift — and in an S-turn that correction shows up as the constantly changing bank that keeps both half-circles symmetric about the road.
A note on the hint that came with this topic: PLT245 — “Recall forces acting on aircraft / stalls / spins” — is not the correct code for S-turns. That code covers aerodynamic stalls and spins, a different subject entirely. The verified, on-target codes for this article are PLT258 and PLT198. Master the ground-track diagram logic and the effect of wind on your track, and you’ve covered what the FAA actually tests here.
Frequently Asked Questions
What is an S-turn in flying?
An S-turn is a ground reference maneuver where you fly equal half-circles on opposite sides of a straight line, usually a road, crossing the line wings-level each time. The Airplane Flying Handbook (AFH, FAA-H-8083-3C) covers it in Chapter 6. The purpose is to practice correcting for wind drift while holding a precise ground track.
Why do you cross the road with wings level?
Crossing the reference line wings-level marks the clean boundary between two equal half-circles. If you’re already banked at the crossing, your geometry is off before the loop even starts, and the two halves won’t match. Wings-level crossings, every pass, are exactly what the examiner is looking for in a properly flown S-turn.
Where is the bank steepest in an S-turn?
Your bank is steepest right after you cross the line flying downwind, because that’s where your groundspeed is highest. As the airplane turns into the wind your groundspeed drops, so you steadily shallow the bank, reaching the shallowest point heading most directly into the wind. The rule to memorize: steepest bank downwind, shallowest bank upwind.
Why does the wind make one loop bigger than the other?
If you hold a constant bank instead of varying it, the wind stretches the loop on the side where it pushes you away from the road and pinches the loop where it helps you turn back. To make both half-circles equal, you continuously change bank to match your changing groundspeed — more bank when fast downwind, less when slow upwind.
At what altitude do you fly S-turns?
The Airplane Flying Handbook recommends roughly 600 to 1,000 feet AGL for ground reference maneuvers. That band is low enough to clearly perceive wind drift against the ground but high enough to leave a safe margin if you get distracted or slow. Your instructor will set a specific practice altitude before you begin.
Are S-turns on the Private Pilot checkride?
Yes. S-turns across a road are part of the ground reference maneuvers area of operation in the FAA Private Pilot Airman Certification Standards (ACS). You must fly equal half-circles to set tolerances for altitude and ground track while staying coordinated and dividing your attention between the airplane and the reference line on the ground.
How are S-turns different from turns around a point?
S-turns are a series of half-circles of equal size on opposite sides of a straight line, crossing the line wings-level each time. Turns around a point are one continuous circle around a single ground reference, with the bank changing all the way through 360 degrees. Both train varying bank for wind, just in different geometries.
Why do S-turns help with the traffic pattern?
The traffic pattern is itself a ground reference maneuver — a rectangular course around a runway. The wind-drift correction you drill in S-turns, especially reading the ground and adjusting bank on the fly, is the same instinct that keeps your downwind, base, and final from getting blown wide. A pilot who can fly a clean S flies a tidy pattern.
Master every system on your checkride — and on day one.
The Private Pilot Ground School breaks down every FAA subject area in the same plain-English, real-world way you just read — with quizzes, scenarios, and the explanations that finally make it click.
S-turns look almost too simple from the back of the room — just draw an S over a road, how hard can it be? Then the wind shows up and you discover they’re really a lesson in attention and feel. Stick with them. The day both loops come out even and you barely noticed you were correcting, you’ve crossed into real stick-and-rudder flying.


ON THE SAME TOPIC
IFR vs VFR: The Two Sets of Rules Every Pilot Flies By
IFR vs VFR: The Two Sets of Rules Every Pilot Flies By 19 min read Last updated June 2026 · Chris Palmer The difference between IFR and VFR is which set of rules you fly under. VFR — visual flight rules — lets you navigate by looking outside and staying clear of clouds in good […]
 Read more
ASOS vs AWOS vs ATIS: How to Pull the Right Weather Before You Fly
ASOS vs AWOS vs ATIS: How to Pull the Right Weather Before You Fly 13 min read Last updated June 2026 · Chris Palmer The difference comes down to who is talking and what the broadcast covers. ASOS and AWOS are automated, computer-generated weather observations of the conditions right at the field. ATIS is a […]
Read more 
What Is RNAV Navigation? Area Navigation for VFR Pilots
What Is RNAV Navigation? Area Navigation for VFR Pilots 17 min read Last updated June 2026 · Chris Palmer RNAV — Area Navigation — is a method that lets an aircraft fly any desired path within the coverage of ground- or space-based navigation aids, rather than being forced to fly directly to and from stations. […]
Read more 
NDB and ADF Explained: The Oldest Radio Nav System You Still Need to Understand
NDB and ADF Explained: The Oldest Radio Nav System You Still Need to Understand 16 min read Last updated June 2026 · Chris Palmer An NDB (non-directional beacon) is a ground-based radio transmitter that sends a signal in all directions, and an ADF (automatic direction finder) is the cockpit receiver whose needle points straight at […]
Read more 
Stay Connected
Be the very first to get notified when we publish new flying videos, free lessons, and special offers on our courses.
